Hidden Leak Detection Process: What Happens During a Professional Leak Detection Visit
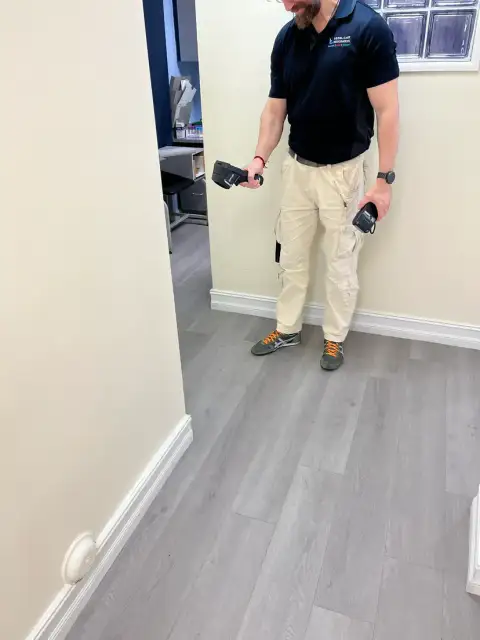
Hidden Leak Detection Process: What Happens During a Professional Leak Detection Visit

If you are trying to understand the hidden leak detection process, the most important thing to know is that the first visit is usually about narrowing the system and documenting the source, not starting demolition. A professional leak investigation is designed to answer three questions in order: Is water still moving when it should not be? Which system is the most likely source? What exact location should the plumber open or repair?
That is the difference between a controlled diagnostic visit and a repair that starts with hope. Total Leak Detection's leak detection service describes a process built around property assessment, non-invasive testing, and a report with exact leak locations and repair guidance. Its article on leak detection vs. trial-and-error plumbing makes the stakes clear: if you cut first and confirm later, you may pay for multiple openings instead of one targeted repair.
| Stage | What happens | Why it matters |
|---|---|---|
| Before the visit | You document symptoms, protect the area if safe, and avoid hiding the clues | The technician gets a cleaner starting point |
| Early visit checks | Meter behavior, symptom history, shutoff logic, and visible evidence are reviewed | These steps narrow whether the leak is likely indoors, underground, irrigation-related, or still unconfirmed |
| Non-invasive testing | Moisture mapping, thermal imaging, acoustic listening, and line tracing are chosen based on the symptom pattern | Tool choice should match the system being tested, not a one-size-fits-all script |
| Handoff | You receive a mark-out or report that helps your plumber plan repairs | The goal is one informed opening, not exploratory damage |
Why hidden leak investigations feel uncertain before the visit
Homeowners usually call for leak detection when something feels wrong but the source is still invisible. The bill jumps. A stain dries and returns. A floor feels warm. The wall smells musty, but the plumbing you can actually see looks normal. Total Leak Detection's article on when to call a leak detection specialist says that is the moment leak detection earns its keep: you have evidence of a leak, but not enough certainty to start opening finishes.
That uncertainty is normal because symptoms travel. Water can move along framing, slab gaps, cabinets, and insulation. Total Leak Detection's DIY leak detection guide points out that a moisture meter can show dampness without proving the original source, and a consumer thermal camera can show a pattern without telling you whether the cause is plumbing, HVAC, sunlight, or another condition.
So the right expectation is not, "The technician walks in and instantly knows the answer." The better expectation is, "The visit will reduce the number of possible systems quickly, then use the right tools on the most likely one."
What to do before the technician arrives
The best prep is not complicated, but it should be deliberate.
Start with documentation:
- Take photos of stains, wet flooring, warped trim, or visible drips
- Save a photo of the recent water bill if the call started with a spike
- Write down when the symptom appears: after showers, laundry, irrigation cycles, rain, hot-water use, or all the time
- Leave access clear around the wet area, water heater, meter, or suspected fixture if you can do it safely
Do not over-clean the evidence first. TLD's DIY guide specifically warns against drying away active clues before photos are taken if that cleanup is not required for safety. In other words, do the emergency protection work you need to do, but do not turn the scene into a mystery before the visit starts.
Your one useful homeowner test is usually the meter. The Portland Water Bureau leak guide says to turn off all water use inside and outside the house, then watch whether the leak indicator or sweep hand is still moving. EBMUD's guide adds one practical trick: take a photo of the dial or mark the hand position before you wait 30 minutes and recheck it.
That prep helps. It does not replace the visit. If water is near outlets, electrical panels, or fixtures, or if active flooding is spreading, stop the DIY phase and treat it as an emergency first.
Step 1: symptom review, meter checks, and system isolation
The first part of the visit is usually less glamorous than people expect, but it is where the investigation gets smarter.
Total Leak Detection's specialist article says the technician will typically ask about:
- where the symptom started
- whether prior repairs were attempted
- whether the water was shut off
- the age of the home and any repipes or remodels
- whether the problem is constant or intermittent
That conversation matters because it tells the technician which system deserves the first test. A ceiling stain after a shower is a different problem from a water meter that moves overnight. A wet yard after irrigation is a different problem from a warm slab in the middle of the living room.
The meter is often the first decision tool. Portland's utility guidance says that after you shut off the home's main valve and verify the valve actually works, continued meter movement suggests water is flowing between the meter and the house shutoff, while no movement points back toward something inside the home's plumbing. EBMUD adds one more useful caveat: if irrigation branches off before the house shutoff, that irrigation valve needs to be isolated too, or you may misread the result.
That is why a good technician does not just ask, "Did the meter move?" A better diagnostic question is, "What was shut off when it moved, and what was still connected?"
Step 2: visual inspection and moisture mapping

Once the system is narrowed, the visit usually becomes a guided visual inspection. The technician is looking for pattern, not just puddles:
- fresh versus older staining
- bubbling paint or soft drywall
- warped flooring or baseboards
- damp cabinet backs, vanity walls, or closet corners
- odor concentration
- whether moisture is spreading outward or collecting in one zone
This is also where moisture mapping earns its place. TLD's service page lists moisture meters as part of the standard non-invasive tool mix. The meter does not magically identify the broken pipe, but it helps confirm how far the moisture migrated and whether one suspected area is actually wetter than the next.
That distinction matters during repair planning. If the moisture trail is broad but the highest readings cluster near one plumbing wall or floor penetration, the repair opening can often be planned more intelligently. If the wettest area is far from the visible stain, the visit may shift away from the symptom and toward the plumbing layout behind it.
This is also the phase where the technician checks the obvious "cheap fixes" so the rest of the visit is not wasted. TLD's DIY guide lists toilets, visible fixture leaks, hose connections, and appliance hookups as the kinds of problems a homeowner or plumber may be able to address directly when the source is clear.
Step 3: acoustic, thermal, and line-tracing tests

After the visit narrows the likely system, the technician can choose the tool mix with purpose.
According to TLD's leak-detection service page and its comparison articles, the common non-invasive tools include:
- Acoustic listening for pressurized supply leaks
- Thermal imaging for temperature changes related to moisture or hot-water lines
- Moisture meters to confirm affected materials
- Video inspection when drain or sewer conditions are part of the problem
- Line tracing or related locating methods to understand where the pipe run actually goes
The important point is not that every job uses every tool. The important point is that the tools answer different questions.
If the meter moves when everything is off, acoustic testing may become more valuable. If the symptom is a warm floor over a hot-water line, thermal patterns may help narrow the area faster. If the leak only appears when a shower, tub, washer, or irrigation zone runs, fixture or zone-specific testing may matter more than broad listening.
This is where the visit separates from trial-and-error work. TLD's trial-and-error article explains that the goal is to identify the leak closely enough that the repair can be limited to one smaller opening instead of multiple exploratory cuts. Sometimes that still means drywall removal, tile access, or even slab access during the repair phase. What changes is where that opening happens and how confident the plumber can be before making it.
What the leak report or mark-out should give your plumber

The handoff is the part many homeowners underestimate.
TLD's service page says the visit output includes exact leak locations, photos, recommended repairs, and documentation that can be used for insurance or repair planning. Its trial-and-error article adds that a useful report may describe the leak location relative to a reference point and note whether the leak appeared active during testing.
That is the difference between:
- "There is probably a leak in this bathroom wall somewhere"
and
- "The strongest evidence points to this supply line, near this reference point, with this moisture pattern and this recommended access area"
For the plumber, that handoff can shape labor time, access planning, finish protection, and whether one repair opening is enough. For the homeowner, it reduces the chance that the repair phase begins with another round of guesswork.
This is also the right time to ask practical questions:
- Will I receive a written report or only an on-site mark-out?
- Does the report identify the likely line or system involved?
- Is the leak described as active, intermittent, or suspected?
- Are photos included?
- Can I share the findings with my own plumber, or do you refer repair partners?
TLD's standard-plumbing explainer says either model can work. Some companies do both detection and repair. Others specialize in diagnostics and hand the report to your plumber. The key is the sequence: locate first, repair second.
When leak detection is not the right first call
Leak detection is not the best first step for every plumbing problem.
If the leak is visible and accessible - a dripping shutoff valve under a sink, a toilet tank leak, a burst pipe in the open, or a loose washing-machine hose - a plumber can often repair it directly. TLD says that clearly across its specialist, DIY, and standard-plumbing pages.
Leak detection also should not replace emergency judgment. If there is active flooding, a sagging ceiling, sewage backup, or water near electrical hazards, the first move is to control the emergency if it is safe to do so and get urgent help.
And finally, leak detection should not be treated like a promise that no finished surface will ever be opened. The real benefit is a smaller, better-informed repair path. Sometimes the answer is still a wall cut, slab access point, or excavation. The goal is to avoid blind demolition, not to pretend repairs never require access.
What happens after the source is confirmed
After the leak is narrowed and documented, the repair phase should become more predictable.
That may mean:
- handing the report to your plumber
- scheduling the repair with the same company if it offers both services
- sharing the photos and findings with a property manager, insurer, or buyer-side contractor when documentation matters
TLD's service page says the company can connect homeowners with repair partners or provide the report for any licensed plumber to use. Either way, the homeowner should leave the visit with more than "we think it is somewhere over there."
The best outcome is clarity:
- which system is leaking
- where the strongest evidence points
- what access is most likely needed
- what documentation you should keep before repairs begin
If that is what you need, a targeted leak detection visit is not just another service call. It is the step that makes the repair phase more precise and less destructive.
Service availability, repair scope, and documentation needs can vary by property. Confirm the next steps with your leak detection provider and licensed plumber before repair work starts.